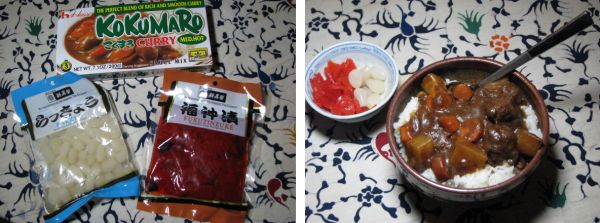
Relatively easy to make once you have all the proper ingredients, Japanese kare-raisu (Japanese Curry) is great for lunch and goes well with Japanese pickles and beer (tsukemono). Our intern from Japan, Kanako, brought this dish for lunch and we immediately knew it was worthy of "Recipe of the Month"! Enjoy. Douzo tabete kudasai!
Japanese curry is a thick, smooth and sweet curry that is quite different in texture and taste from Indian curries. Japanese curry is always served over a bed of Japanese short-grained rice and is consequently always called kare-raisu.
The spices for Japanese curry often come in powder form or flat bricks that you break apart, much like one would a bar of chocolate. The brand names are sometimes quite cross-cultural, like Java, House, and Vermont. Other brands found in the U.S. include Kikkoman, S&B & Kokumaru. Spice (and thickener) mixtures come in mild, medium and hot versions. Spiciness is not the only difference between these brands, as each of these spice mixtures have their own unique taste and some cooks even mix the spice concoctions in varying proportions to achieve the taste they desire
Other than the thickening spice mixture, basic ingredients are potatoes, onions, carrots and meat. Dark-meat chicken is used frequently, however chicken breasts, beef or pork can also be used. The type of meat being used is often related to regions of Japan: pork is used in the north, beef is preferred in central Japan and chicken is most popular in the south, but all can be found throughout Japan. Individual cooks achieve variety by adding additional ingredients, including apples, coffee, peas, caramelized onions, ginger, garlic, cayenne pepper, ketchup, Tonkatsu sauce, Worcestershire sauce, and whatever else pleases the cook's palate. Regional curries have ingredients as diverse as scallops, pears, mackerel, oysters and bitter melon. The important goal when cooking kare-raisu is that vegetables and meat be soft yet firm, so the cooking time and temperature are important in order to achieve best results.
Japanese curry can also be bought pre-packaged, which is quite popular in Japan, but varies in quality. Kare-raisu is the main course served to members of the Japanese defense forces every Friday and is a popular food to eat while camping.
Even though Japanese curry is thick and Japanese rice is somewhat sticky, kare-raisu is typically eaten with a large spoon rather than hashi (chopsticks). It is often served with tsukemono vegetables pickled in vinegar such as fukujinzuke (a pickle made of daikon, which is Japanese radish, eggplant, lotus root, cucumbers and a variety of other ingredients) or rakkyo (scallions pickled with vinegar, salt, soy sauce and sugar). The importance of tsukemono should not be underestimated because the crunchy acidic tartness contrasts nicely with the sweet thick taste and feel of the kare-raisu.
Kare-raisu is thought to have been introduced to Japan by English sailors during the Meiji period, at the end of the 19th century.
Ingredients:
- 1/2 package Kokumaro curry
- 1/2 lbs of your choice of meat, diced or sliced thickly (this recipe uses beef).
- 1 large potato
- 1 medium carrot
- 1/2 Fuji apple, grated
- 1 medium-sized white onion, half finely chopped, half cut in wedges
- 1 clove of garlic, crushed or grated
- 1 cup of Red wine (secret ingredient!)
- 2 tablespoons instant coffee
- 1 tablespoon oyster sauce
- 1 1/2 cups water
- Salt and pepper
- Canola or Peanut oil
Preparation:
- Dice the potatoes and carrots into half-inch cubes or pieces (not too small!).
- Finely dice half the onion and then cut the remainder into small wedges.
- Sprinkle a moderate amount of salt and pepper on both sides of beef.
- Combine red wine, curry powder and grated garlic in a bowl (marinade).
- Place beef in a small container, pour marinade over beef and then refrigerate for at least 15 minutes.
- Slice the beef into small strips.
- Sauté the chopped onion in 2 tablespoons of oil in a frying pan. Use low heat for up to 30 minutes until the onions are caramelized.
- Remove beef from marinade, drain and reserve the wine.
- In a fry pan set on high, brown the beef in a tablespoon of oil.
- Transfer beef to the pot with the caramelized onions.
- Add the vegetables and water and simmer for 5 minutes.
- Add grated apple and marinade sauce and simmer for another 10 minutes.
- Add water (preheat to boiling) and gently simmer until potatoes are just soft. If foam forms on the top, skim it off.
- Add the curry seasoning and gently mix well until completely dissolved. Slicing the curry roux first helps it dissolve faster. If curry is too thick, add some extra water.
- Turn off the heat.
- Add instant coffee (or real coffee) and oyster sauce for added taste.
- Serve on top of rice in a bowl. Don't forget the tsukemono!
Recipe submitted by Kanako Masubuchi
Photographs by T. & S. Johnston-O'Neill
- Details
- Hits: 4925
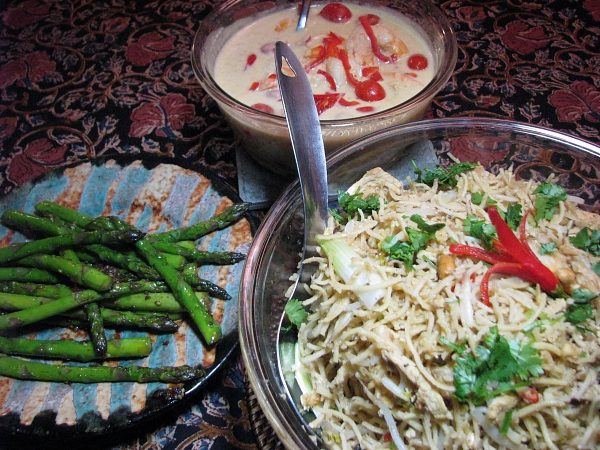
Normally (there have been exceptions) we only publish one recipe at a time, but we cooked all three of these Thai specialties to see which might be the best for the recipe of the month and they all were so good we decided to publish all them all together. All these recipes are modified versions of recipes found in The Ultimate Thai and Asian Cookbook by Deh-Ta Hsiung, Becky Johnson and Sallie Morris. The book has a very nice section on ingredients. It is quite common in Thailand and other Southeast Asian cultures to serve several dishes at a time for a meal, not in courses. Even Thai soups are served with other dishes and not before a meal. Many dishes from this area of the world are based on a harmonious blend of sweetness (often palm sugar), sourness (vinegar, limes, lemons and tamarinds), saltiness (salt, soy sauce, fish sauce) and spiciness (hot chilies). Chicken, pork (except in Muslim households), fish and shellfish are the most common protein sources.
A couple of cooking tips: Some of the ingredients, fish sauce, Thai chilies, roasted sesame seeds and galangal root might require a visit to an Asian grocery store like 99 Ranch Market. It's up to you whether you use coconut milk or the thicker coconut cream. Authentic Southeast Asian curries are cooked in "first pressing" coconut milk that is boiled until it is thicker than canned coconut milk. Coconut oil (now available at Costco!) and peanut oil are perhaps the most used cooking oils. Some people use other oils, so if you are dead set on using olive oil, use light olive oil as it has a lighter taste and can be cooked at a higher heat which is required in stir fry cooking. Smoke coming off of cooking oils is quite toxic, so don't heat oil to the point past its smoking temperature. We were quite curious about the cherry tomatoes in the Shrimp curry, turns out they were surprising (you will see what we mean when you try them) and delicious!
Yellow Curry Shrimp Ingredients:
- 2 1/2 cups coconut milk or cream
- 2 tablespoons yellow curry paste
- 1 tablespoon Thai fish sauce (the lighter the color, the better)
- 1/2 teaspoon of salt
- 1 teaspoon of sugar
- 1 pound of large shrimp, peeled and de-veined
- 1/2 pound of cherry tomatoes
- 2 tablespoons of lime juice
- 3/4 of a red pepper cut into to 1/2 inch squarish pieces
- 1/4 of a red bell pepper, sliced into very thin strips for garnish
- the leaves from several sprigs of coriander (cilantro) for garnish
Preparation:
- Boil water in a large pot.
- Add noodles to boiling water and then immediately turn off heat.
- Let noodles stand in the hot water for 5 minutes and then rinse and drain.
- Add 3 tablespoons of oil on medium high heat until hot (before it smokes!)
- Add garlic and cook for 30 seconds.
- Immediately add pork and chicken and cook while tossing everything about.
- When the pork and chick become lightly browned, add shrimp and cook for another 2 minutes. Keep everything moving with your spatula.
- Add sugar, fish sauce and lemon juice, and mix everything until the sugar dissolves.
- Add remaining oil and then the drained noodles mixing everything very gently as the noodles might break if you are too vigorous.
- Pour beaten eggs all over everything and mix gently, cooking until the egg is just about set.
- Gently mix in chillies, bean sprouts, 1/2 the peanuts, 1/2 the scallions and 1/2 the cilantro leaves.
- Cook for another 2 minutes, gently keeping everything moving.
- Transfer fried noodles to a serving dish and garnish with remaining peanuts, scallions and cilantro leaves.
Serve with Jasmine Rice Spicy Thai Fried Noodles>
Ingredients:
- 4 tablespoons cooking oil (coconut or peanut oil are best)
- 1/2 package (8 oz) of thin Asian egg noodles (rice noodles can also be used)
- 2 garlic cloves, crushed, grated or finely chopped
- 1/2 pound of pork sliced into very thin strips (can be bought presliced in Asian groceries)
- 1/2 pound of white or dark meat chicken, cut into thin strips
- 1/2 pound of shrimp, peeled and de-veined
- 2 eggs, beaten but not whipped
- Juice from one lemon
- 3 tablespoons of fish sauce
- 2 tablespoons of palm sugar or brown sugar
- 1 - 10 fresh red Thai chilies, seeded and finely sliced (adjust amount for tolerance)
- 1 cup of fresh bean sprouts
- 3 scallions (green onions), white portion cut into 2 inch pieces and then hand shredded
- the leaves from several sprigs of coriander (cilantro)
Preparation:
- Boil water in a large pot.
- Add noodles to boiling water and then immediately turn off heat.
- Let noodles stand in the hot water for 5 minutes and then rinse and drain.
- Add 3 tablespoons of oil on medium high heat until hot (before it smokes!)
- Add garlic and cook for 30 seconds.
- Immediately add pork and chicken and cook while tossing everything about.
- When the pork and chick become lightly browned, add shrimp and cook for another 2 minutes. Keep everything moving with your spatula.
- Add sugar, fish sauce and lemon juice, and mix everything until the sugar dissolves.
- Add remaining oil and then the drained noodles mixing everything very gently as the noodles might break if you are too vigorous.
- Pour beaten eggs all over everything and mix gently, cooking until the egg is just about set.
- Gently mix in chillies, bean sprouts, 1/2 the peanuts, 1/2 the scallions and 1/2 the cilantro leaves.
- Cook for another 2 minutes, gently keeping everything moving.
- Transfer fried noodles to a serving dish and garnish with remaining peanuts, scallions and cilantro leaves.
Thai Asparagus
Ingredients:
- 1 pound of asparagus, tough parts removed
- 2 tablespoons peanut oil
- 1 garlic cloves, crushed, grated or finely chopped
- 1 tablespoon roasted sesame seeds (can be bought from a Japanese or Asian grocery)
- 1 inch piece of galangal root, finely grated (can be found in an Asian grocery, otherwise substitute with ginger)
- 1 - 3 fresh red Thai chillies, seeded and finely sliced (adjust amount for tolerance)
- 1 tablespoon of fish sauce
- 1 tablespoon soy sauce (light if available)
- 3 tablespoons water
- 1 teaspoon of palm sugar or brown sugar
This recipe is also good with broccoli, bak choi or green beans (if using green beans, parboil for 2 minutes before using).
Preparation:
- Snap or slice off and throw away the tough parts of the asparagus stalks.
- Heat the oil in a wok over high heat until it is very hot but not smoking.
- Add garlic, grated galangal and sesame seeds to the wok and fry for 10 seconds.
- Add all of the remaining ingredients (asparagus, chillies, fish sauce, water and sugar).
- Toss ingredients and cook for 2-3 minutes until the asparagus is tender. Using two big spoons for this task works well (grab and lift).
- Transfer to a plate or serving dish and serve immediately.
Recipe by T. Johnston-O'Neill
Photo by Shari K. Johnston-O'Neill
- Details
- Hits: 3875
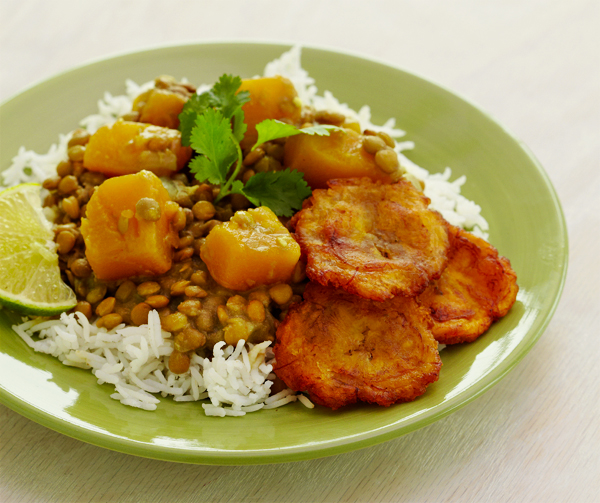
Zapallo and Lentil Stew with Matura Twice Fried Plantains are very popular among the Embera and Waounan indigenous people of Panama. The Embera and Waounan people live in the Darien region of Panama. The Pan-American Highway transects Darien in half, sometimes also dividing and separating entire communities. Both Embera and Waounan cultures have been heavily influenced by contact with Latinos. Sadly, some of the indigenous culture has started to disappear. Recently there have been local efforts to preserve indigenous culture and traditions. Tourism has played an important role in this cultural conservation as local culinary specialties and traditional handicraft items are being produced for tourists. These efforts have not only helped to preserve some of these traditions, but they have also provided some increasingly important cash for families and communities. Locals have even created websites and tours for visiting and potential tourists.
Most Embera and Waounan food uses ingredients that are locally collected, farmed, fished or hunted. Traditional cuisine has been augmented by spices introduced by Latinos. Usually cooking is done on an open fire fogon stove that either sits on the ground or on top of wooden legs. Daily food is usually simple faire, but special celebrations call for more elaborate meals. Zapallo resembles a pumpkin or calabaza squash; for this recipe you may substitute banana, butternut or other squashes. Zapallo and Lentil Stew is a common daily dish, which is sometimes eaten along with fried fish or meat. This stew is often served over rice. In Panama rice is a staple crop and comprises nearly a quarter of the protein consumed by the average Panamanian. Plantains, a close relative of the banana, are eaten throughout South and Central America. They are usually fried in some manner and seasoned with salt.
Ingredients
- 1 Zapallo pumpkin, butternut or banana squash, peeled and cut into 1-inch chunks.
- 1 pound package of brown lentils (check for small stones)
- 1 14-ounce can of coconut milk
- 2 14-ounce cans of chicken or vegetable stock
- 2 tablespoons curry powder
- 1 teaspoon cayenne chili powder (or to taste)
- 2 teaspoons ground coriander
- Salt and pepper to taste
- A large onion, diced
- 4 or 5 cloves of garlic, chopped or crushed
- Several sprigs of cilantro or cilantro leaves
- 2 tablespoons vegetable oil
- Fresh lime juice
Preparation
- Fry onion in oil over low heat until translucent.
- Add garlic, curry powder, ground coriander and cayenne and fry for another 30 seconds.
- Add squash, lentils, coconut milk, stock (or water) to pot.
- Add water to bring liquid above all the ingredients. Bring to a boil.
- Reduce heat and simmer for 30-40 minutes, until the squash and lentils are tender.
- Serve over rice and garnish with culantro (or cilantro) and a healthy squirt of lime juice.
Maturana (Twice Fried Plantains)
Ingredients:
- 4 plantains
- Salt to taste
- Oil for cooking
Preparation:
- Slice Plantains into 3/8 inch thick rounds.
- Fill a fry pan ¼ deep with cooking oil (peanut oil works fine). Note: if you use a 9-inch frying pan you should be able to fry one plantain at a time.
- Heat oil to medium high heat (350 degrees F.).
- Fry plantain slices, turning once to lightly brown both side.
- Remove plantain slices and drain on rack or paper towels.
- When the slices are cool enough to handle, press them flat with a flat-bottomed glass or bottle. Press them until they are about a ¼ thick.
- Refry the plantain slices, browning them further on both sides.
- Remove fried plantain, drain on rack or with paper towels. If you can store the plantains on their side, they will remain crisper longer.
- Salt the plantain chips before serving.
Recipe by T. Johnston-O'Neill
Photo by Heidi Adams
- Details
- Hits: 3773
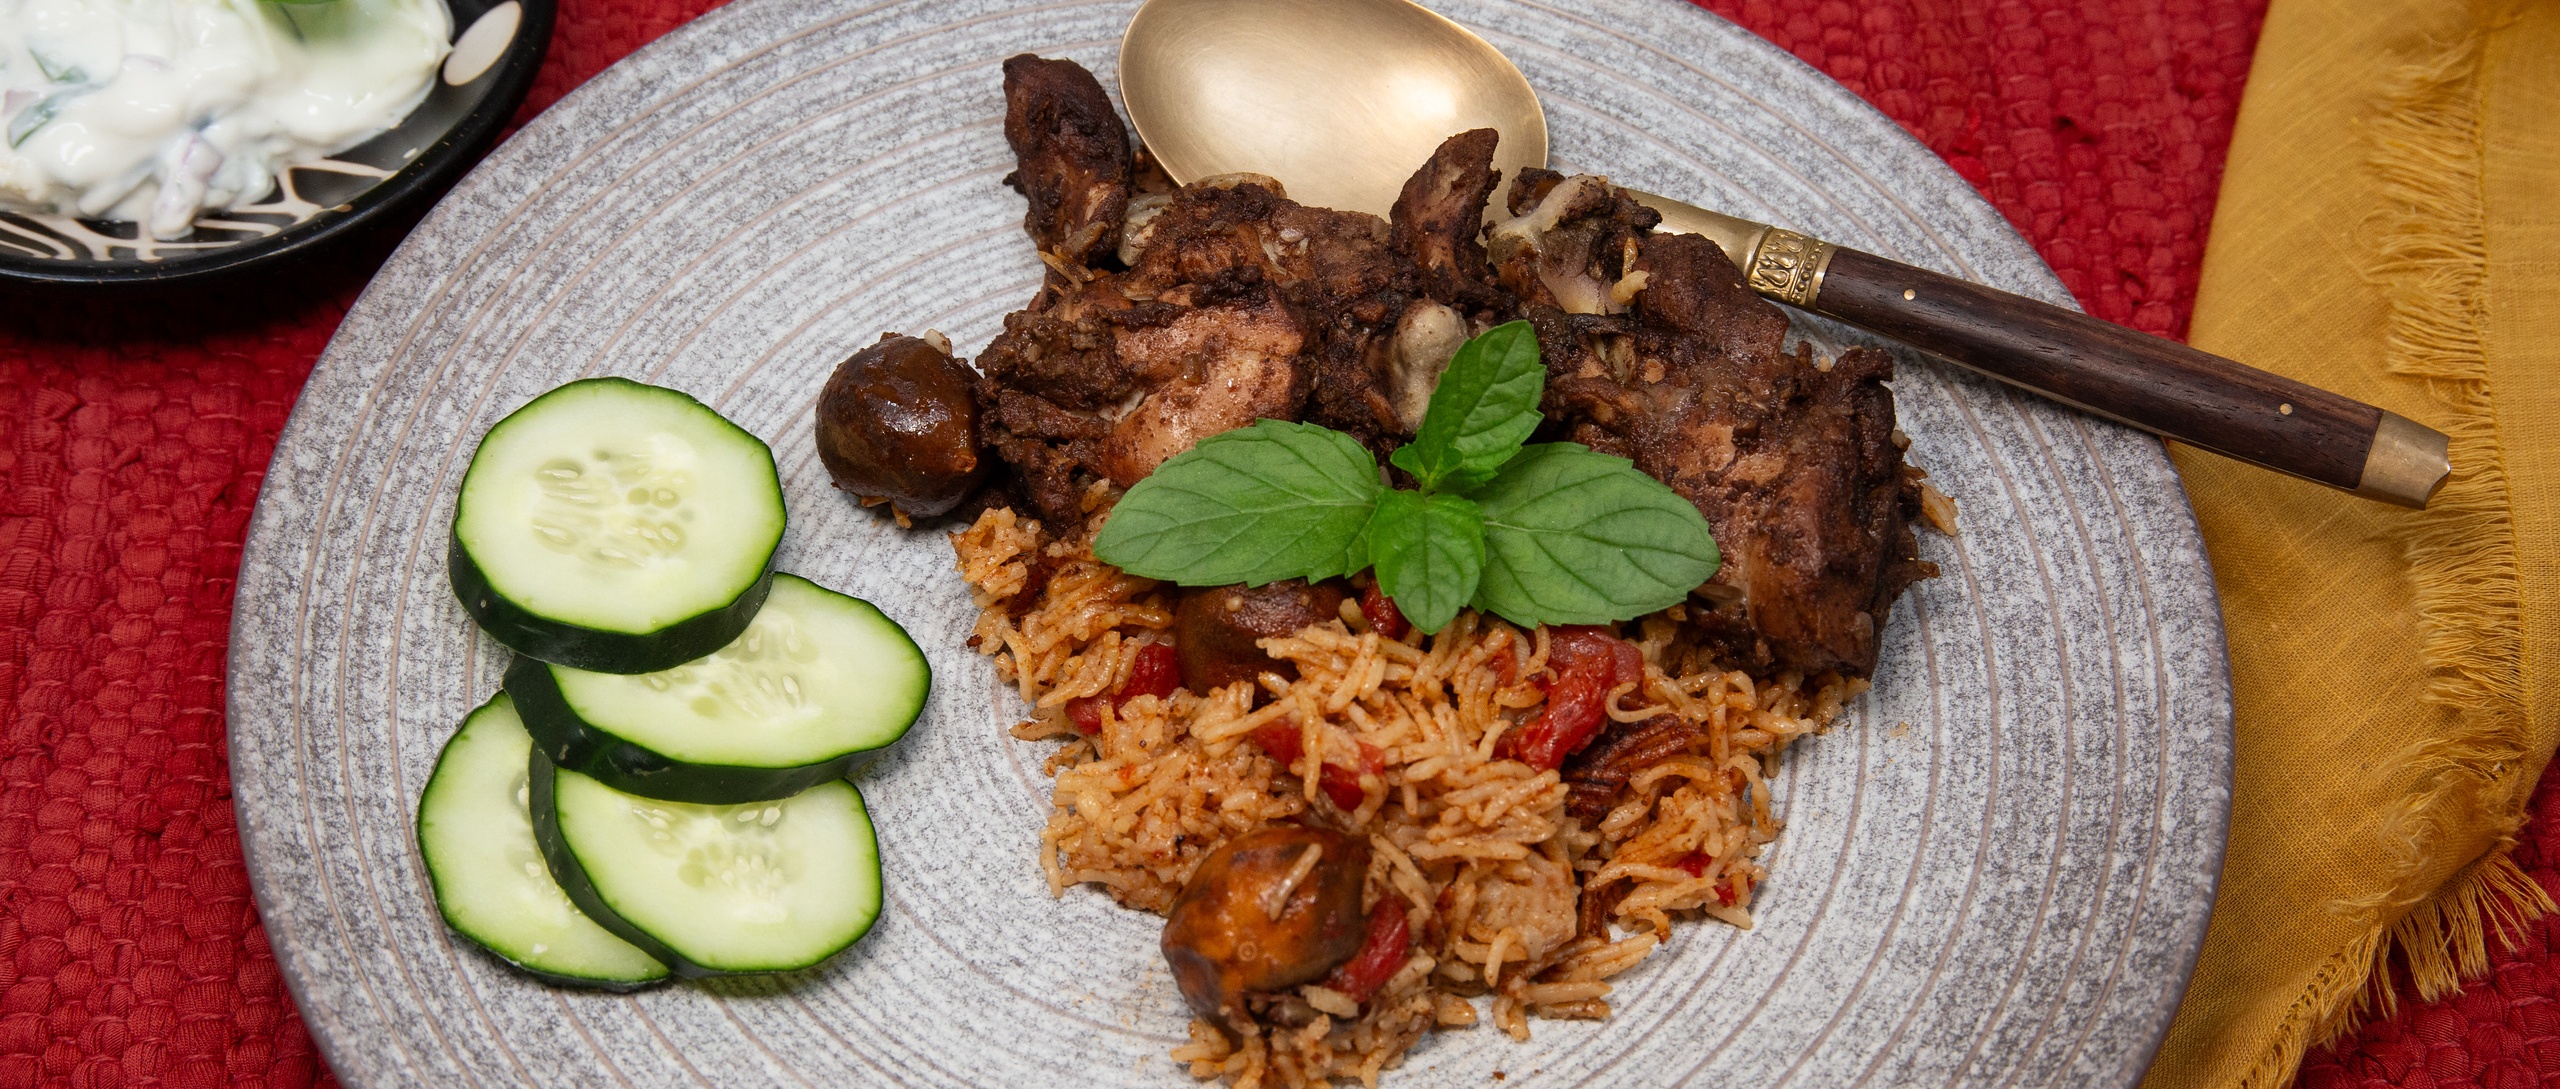
Chicken Kapsa is a popular chicken and rice dish found in Saudi Arabia, Syria, and elsewhere in the Middle East. It is a dish we cook regularly in our house. It is considered the national dish of Saudi Arabia and is often eaten at family dinners. There are many kinds of Kapsa. This version has some unique ingredients that you will have to either make yourself or hunt down in a Middle Eastern grocery store. One of these ingredients is dried lime (sometimes called "black lime", or loomi) or lemon. Dried limes or lemons are exactly what they sound like, which means they're dried until they're completely desiccated. You can make them yourself but it will take weeks or even months (I haven't tried using a dehydrator). You need to poke 3 or 4 holes in the dried limes so that the flavors can permeate the dish. Also, you can either buy Arabic Seven Spice (called baharat in Turkey, which simply means "spices") in a Middle-Eastern grocery store or make it yourself (see ingredients below). Basmati rice is the rice of choice; other rices simply won't work very well with this dish. If you can get aged Basmati rice, it tastes better. You can augment Kapsa with raisins, almonds or pine nuts. While Saudis often eat lamb at ceremonial or festive occasions, they are the highest consumers of chicken per capita in the world. If you can find soft kimaje flatbread, that's a good complement to this dish. Salata Kheyyar Bel-Labban is a yogurt, cucumber and mint "salad" that is excellent with Kapsa. Using strained (Greek, Indian, or Middle Eastern) yogurt is best. Pre-prepared sauces are not nearly as tasty. Like many foods, the yogurt salad and the Kapsa itself taste better the next day.
Kapsa Ingredients
- 1 whole chicken cut up
- 1 medium onion chopped
- 1 small can tomato paste, fresh tomatoes or small can of tomatoes
- 2 tablespoons Arabic Seven Spice
- 1 cinnamon stick, or a teaspoon of ground cinnamon
- 4 dried lemons or limes (with 1/4 inch holes poked in them)
- 2 tablespoons raisins (optional)
- 1 teaspoon of crushed garlic (optional)
- 3 cups of chicken broth
- 2 cups rinsed Basmati rice
Arabic Seven Spice (baharat) Mixture
Thoroughly mix the following finely ground spices:
- 2 tablespoons ground black pepper
- 2 tablespoons paprika
- 2 tablespoons ground cumin
- 1 tablespoon ground coriander
- 1 tablespoon ground cloves
- 1 teaspoon ground nutmeg
- 1 teaspoon ground cinnamon
- 1/2 teaspoon ground cardamom
Preparation
- Put the chicken and all the other ingredients except the rice into a medium large pot.
- Bring to a boil and then cover pot and simmer on medium-low heat for 30 minutes.
- Transfer the chicken pieces (leave behind the limes and tomatoes) from the pot to an oven-proof dish and place dish into an oven set at 350 degrees Fahrenheit.
- Add rice to the pot on the stove top.
- Bring to a boil again, cover and reduce heat to low.
- Cook for 15 to 20 minutes until the rice is fully cooked and all the broth is absorbed.
- Fill a serving dish or platter with cooked spice rice, putting the chicken pieces on top of the rice.
Salata Kheyyar Bel-Labban (Yogurt & Cucumber Sauce)
Combine in a mixing bowl the following:
- 1 cup yogurt
- 1 large cucumber, peeled and chopped or quartered and sliced very thinly *
- 1/2 teaspoon of salt
- 1 garlic clove, pressed or chrushed
- 1 teaspoon olive oil
- 1 tablespoon minced fresh mint
* Peeling the cucumber is optional. Usually I puree half the sliced cucumbers, and mix half the yogurt along with the salt, garlic, olive oil and mint in a food processor. Afterwards I combine the pureed mixture with the remainder of the cucumbers and yogurt. For a slightly different taste, dill can be substituted for the mint.
Recipe: T. Johnston-O'Neill
Photo: Kathleen Johnston
- Details
- Hits: 4616
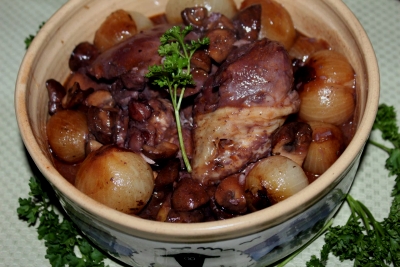
The following recipe is based mostly on Julie Child's recipe from her acclaimed book, Mastering the Art of French Cooking. Like many artistic endeavors, it does take a bit of patience and care. Coq au Vin literally means "Rooster with Wine" in French. Child can be credited with the fame the dish achieved, and nowadays many celebrity chefs have their own versions. The origins of Coq au Vin are shrouded in the mists of history. The ingredients and cooking techniques are very similar (albeit with beef) to Boeuf Bourguignon which we featured in a previous recipe of the month. Like that dish, Coq au Vin uses some very useful cooking techniques (sautéing mushrooms, making a roux and flambé) with wider applications. Child ended her final book, My Life in France, with the following words "... thinking back on it now reminds that the pleasures of the table, and of life, are infinite—toujours bon appétit! This recipe requires you to do three things at once: while the chicken is cooking you should prepare the onions and mushrooms. Alternatively, you can prepare the onions and mushrooms beforehand, adding them as the final step of preparation. Also, please note that the chicken stock, thyme and bay leaf are used to make both the chicken and the onions.
Ingredients:
- 6 slices thick bacon
- 1 large stewing chicken, cut up
- 1/4 cup cognac
- 1 cup (Pinot Noir, Burgundy, Beaujolais or Chianti - Note: Don't use Cabernet!)
- 2 cups chicken broth (use half for main pot and the other half for onions)
- 1 tablespoon tomato paste
- 1 clove garlic, crushed
- 1/2 teaspoon thyme (use half for main pot and the other half for onions)
- 1 1/5 bay leaf (use half for main pot and the other half for onions)
- 1/2 cup of flour
- 1 teaspoon salt
- 1/4 teaspoon freshly ground pepper
- 25 to 30 pearl onions
- 2 tablespoons of light olive oil
- 2 tablespoons of butter
- 1 pound mushrooms, washed, trimmed and quartered if large or halved if small.
- 2 sprigs of parsley
Preparation:
This recipe calls for a large and deep skillet or pan that has a cover. A Dutch oven works fine.
- Slice the bacon into 1-inch pieces and cook on medium heat in a large skillet until lightly crisp.
- Remove the bacon from the skillet.
- Brown chicken pieces in bacon fat, turning to brown all sides. Use a large enough skillet so that the chicken isn't crowded. If the chicken is wet, dry with paper towels first. The USDA recommends washing poultry before you start cooking because otherwise there are risks of contamination from splashing the contaminated water about.
- After the chicken is brown, return the bacon to the pan, cover the skillet and cook the chicken for an additional 5 minutes.
- Turn the chicken over in the skillet, cover and cook for an additional 5 minutes.
- Uncover the pan and pour in the cognac all around the top of the chicken. Flambé by carefully igniting with a lighted match. Swirl the pan around and let the cognac burn off all its alcohol.
- Pour the bottle of red wine into the pan and add just enough chicken broth to completely cover the chicken pieces.
- Stir in the tomato paste, garlic, bay leaf, and thyme.
- Bring the liquid to a simmer, then cover the pan and simmer slowly for about 30 minutes or until the chicken meat is tender when pierced with a fork or an instant-read meat thermometer registers an internal temperature of 165 degrees.
- Remove chicken from the pan and set aside.
- Turn the pan to high heat and boil until there is about 2 cups of liquid remaining and then reduce to a simmer.
- In a small bowl, blend 3 tablespoons of flour with 2 tablespoons of softened butter until it becomes a smooth paste.
- Whisk the butter/flour paste into the simmering liquid in the pan.
- Continue stirring the pan until the sauce thickens (about a minute or so). If the sauce becomes too thick, add more chicken stock. If it is too thin, simmer until it thickens.
- Taste the sauce and add more salt or pepper to taste.
Browned Braised Onions
- Create a herb bouquet by placing the thyme, parsley and bay leaf in a tea ball or by making a pouch with some cheesecloth.
- Cut off the root end of each pearl onion.
- Bring 2 to 3 cups of water to a boil and drop in the onions for 1 minute.
- Remove the onions from the pot, allow them to cool, and then peel.
- Add butter and olive oil and heat until the butter stops bubbling.
- Add the onions and sauté over moderate heat for about 10 minutes, gently moving the onions about so they do not burn.
- Add 1/2 cup of chicken stock and the herb bouquet. Bring to a boil and then reduce heat and simmer the onions for 40 minutes on low heat.
Sautéing the Mushrooms
Although it is often used somewhat indiscriminately as a term, sautéing refers to cooking ingredients on high heat while tossing them so that they don't burn. Sautéing requires less oil than frying and that is the best way to cook the mushrooms for this dish. It is worth the effort.
- Heat 2 tablespoons of olive oil and 2 tablespoons of butter in a frying pan and heat until the butter stops bubbling.
- Sauté on high heat, tossing continuously for 4 to 5 minutes, until mushrooms are lightly browned.
Finishing the Preparation
Return the chicken to the sauce and add the onions and mushrooms, basting everything with the sauce.
If any of the ingredients have become cold during preparation, just bring the sauce back up to temperature and heat through.
Coq au Vin can be served with potatoes, wide noodles or even rice. The dish is particularly good with wide German egg noodles. Like many dishes, Coq au Vin is even better tasting the day after it was prepared.
Recipe by T. Johnston-O'Neill
Photo by Shari K. Johnston-O'Neill
- Details
- Hits: 4027
Joomla!
Extensions
The Joomla! content management system lets you create webpages of various types using extensions. There are 5 basic types of extensions: components, modules, templates, languages, and plugins. Your website includes the extensions you need to create a basic website in English, but thousands of additional extensions of all types are available. The Joomla! Extensions Directory is the largest directory of Joomla extensions.
Components
Components are larger extensions that produce the major content for your site. Each component has one or more "views" that control how content is displayed. In the Joomla administrator there are additional extensions such as Menus, Redirection, and the extension managers.
Modules
Modules are small blocks of content that can be displayed in positions on a web page. The menus on this site are displayed in modules. The core of Joomla! includes 24 separate modules ranging from login to search to random images. Each module has a name that starts mod_ but when it displays it has a title. In the descriptions in this section, the titles are the same as the names.
Content Modules
Content modules display article and other information from the content component.
User Modules
User modules interact with the user system, allowing users to login, show who is logged-in, and showing the most recently registered users.
Display Modules
These modules display information from components other than content and user. These include weblinks, news feeds and the media manager.
Utility Modules
Utility modules provide useful functionality such as search, syndication and statistics.
Navigation Modules
Navigation modules help your visitors move through your site and find what they need.
Menus provide your site with structure and help your visitors navigate your site. Although they are all based on the same menu module, the variety of ways menus are used in the sample data show how flexible this module is.
A menu can range from extremely simple (for example the top menu or the menu for the Australian Parks sample site) to extremely complex (for example the About Joomla! menu with its many levels). They can also be used for other types of presentation such as the site map linked from the "This Site" menu.
Breadcrumbs provide users with information about where they are in a site.
Page 21 of 28


